If you want more information WHY to clean expired and superseded updates you can get more information here from Kent Agerlund.
http://blog.coretech.dk/kea/house-of-cardsthe-configmgr-software-update-point-and-wsus/
Also thank Nickolaj Andersen who made the script that does all the work!
http://www.scconfigmgr.com/2014/11/18/remove-expired-and-superseded-updates-from-a-software-update-group-with-powershell/
Download the file here.
https://onedrive.live.com/redir?resid=D46D4A6EBDD0F10D%211617
First step is to download the files and copy them to a folder of your choice. In the example, I am using C:\Temp

Open the file getAllSoftWareUpdates.ps1 with Powershell ISE as an administrator.

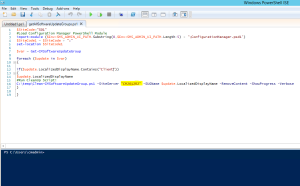
When the file is open you have to change three values , the first value we have to change is the SiteCode , so change the marked SiteCode S01 ( se the picture ) to the SiteCode you are using where you want to clean updates.
The second value we have to change is the “Client” value, this value represents the name of the software update group or groups that you want to clean, for example. If you have 10 “Client” groups and you want to clean all of those, you enter “Client” and if you have five different “Server” groups you change the value to “Servers”. This script will always take every group with the name you enter in the script.

The third and last value we are going to change is the “SiteServer” name ( se picture ) this can be any server with a provider installed ( I usually run this script on the primary site server then you know it will work , if you are not sure how many providers you have on your site ). After you have change the value go ahead and try to run the script.
If everything works it should look something like this really nice that you can follow the progress in the console.


